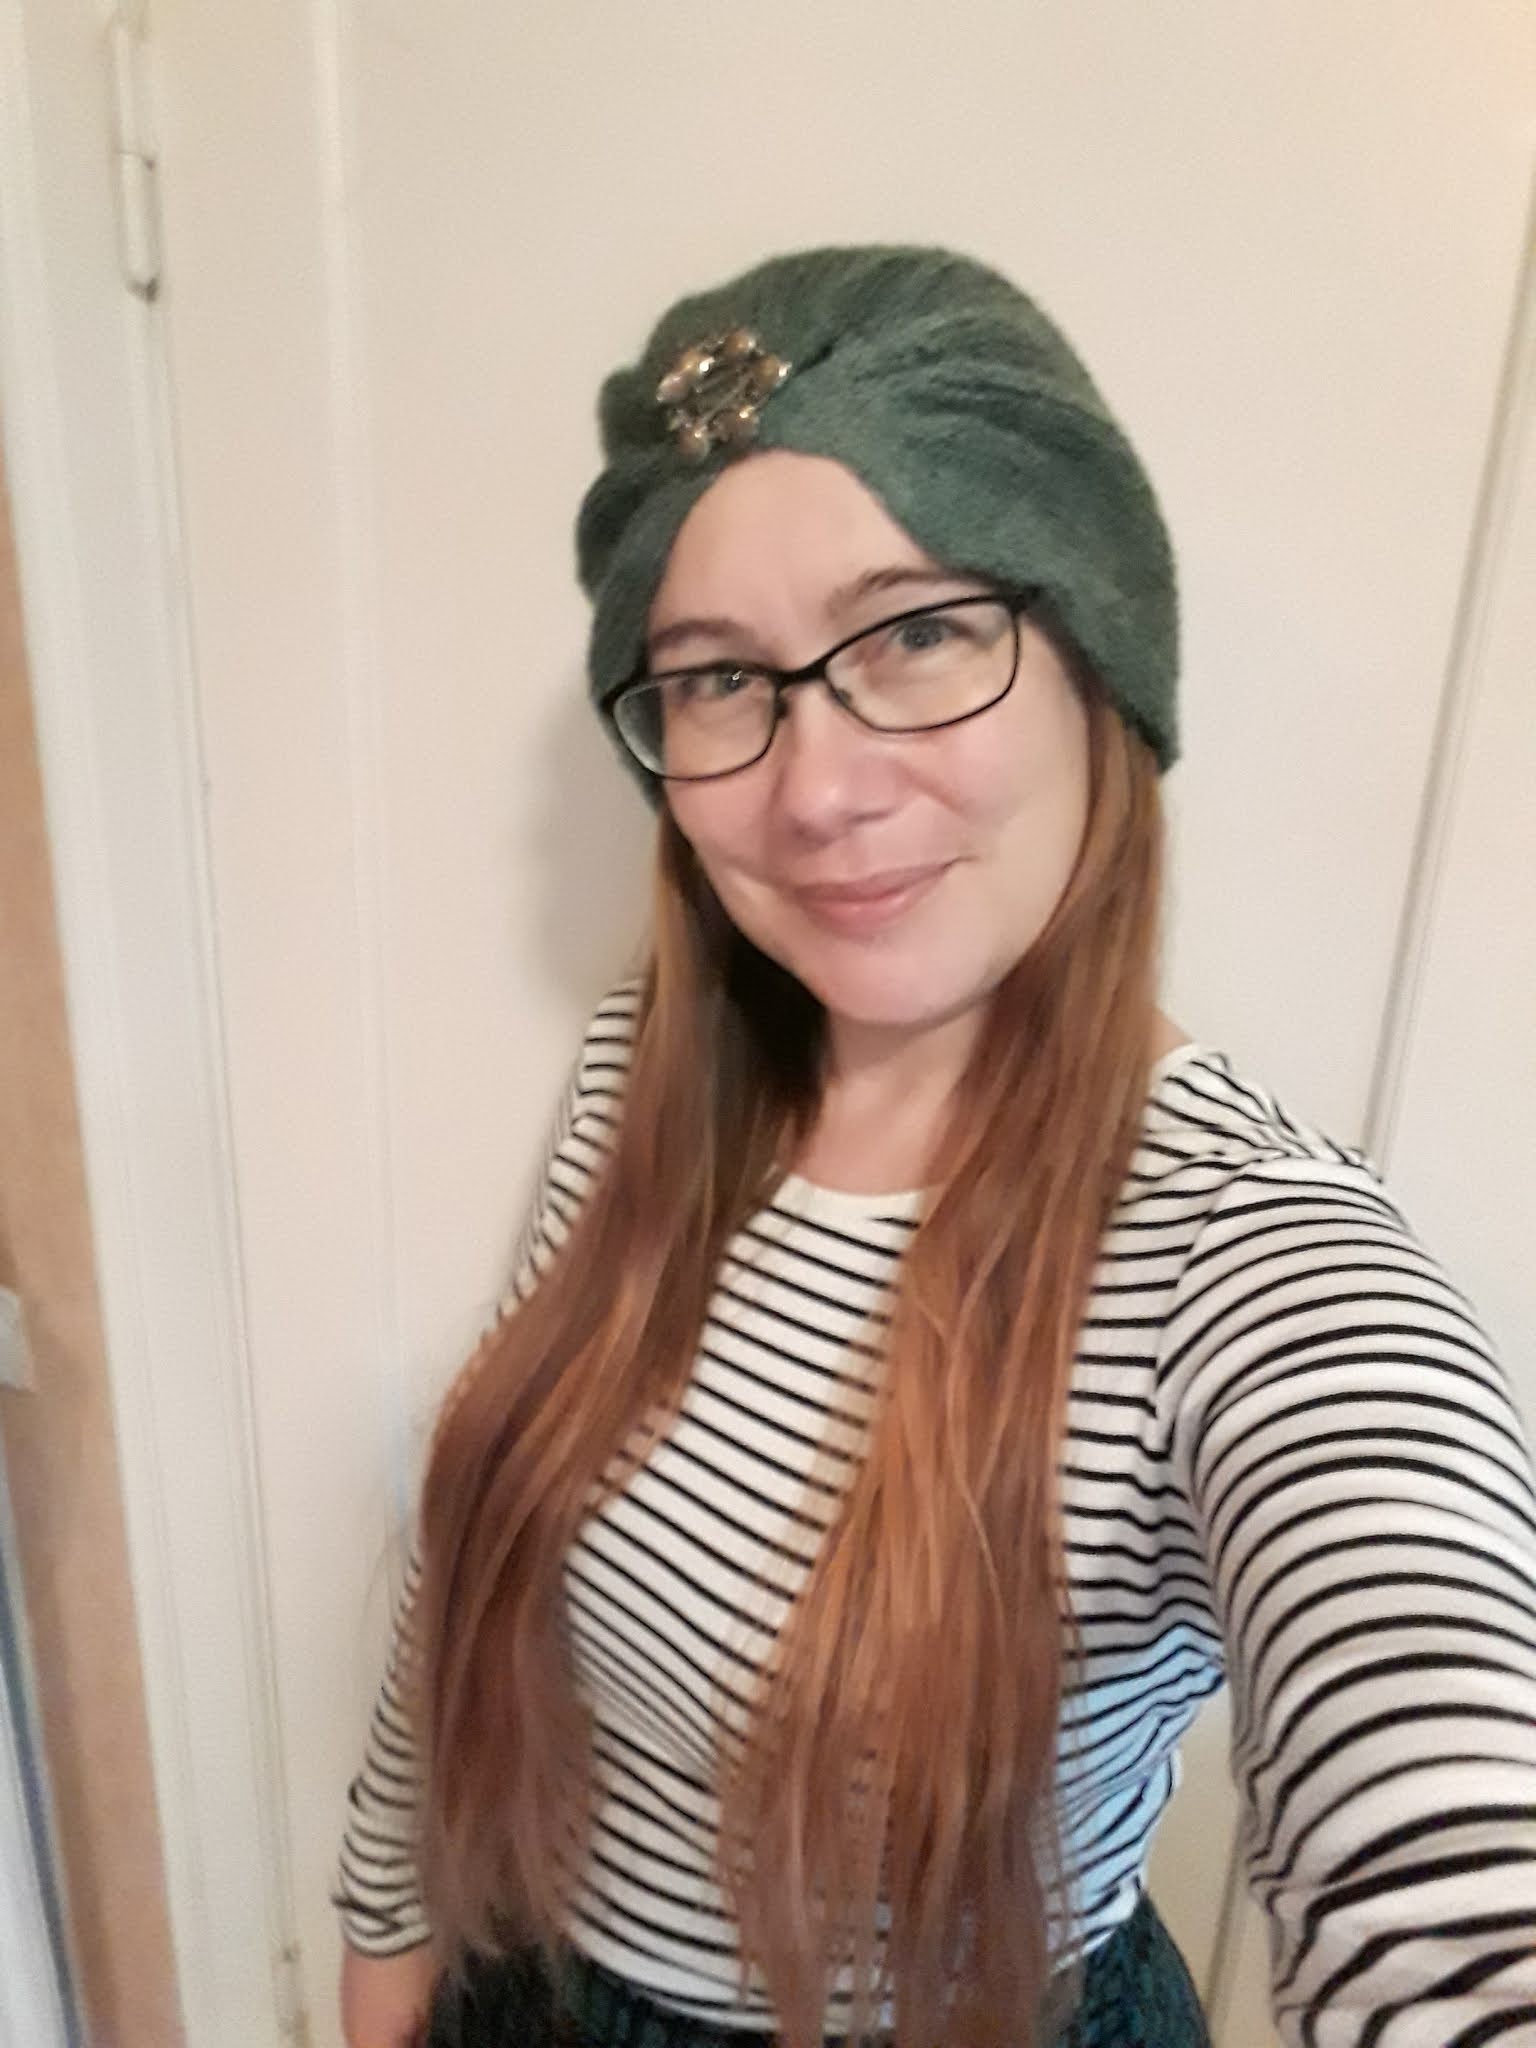
Modified Warm And Cosy Turban
Jeg var dog ikke så vild med den oprindelige opskrift, så jeg har ændret en del på den.
På engelsk ligesom den oprindelige opskrift. Hvis der er interesse for det, oversætter jeg den gerne til dansk. Sig til.
I knitted the most gorgeous winter hat turban, and I want to knit 100 ones of it. 💖 I however thought the pattern could be improved as the pattern for the top was really confusing. Which was a shame because it is a both beautiful and wonderfully thought out pattern. So I made improved instructions, available below
Pattern: The warm and cosy turban by Emma Andersson
Size: One Size
Yarn: Mondial Soave Merino Extrafine
Fibre content: 65% Merino Wool, 25% baby alpaca, 10% PC Microfibre
The instructions: For the sides rectangle were fine, but for the top were very confusing. To the extent that I rewrote the pattern (see modified pattern below).
Anything you particularly liked or disliked about the pattern
Positive: Ingenious design. I would have never come up with a construction like that, and I love it. And the front is perfect for a broche.
Negative: It wasn’t tall enough to cover my ears.
Modifications:
I added two more rows to increase the sides rectangle enough that the hat covers my ears (see modified pattern below).
Would you recommend the pattern? Would you use this pattern again?
I highly recommend the pattern, it is such a GORGEOUS look. And a fairly qiuck and simple knit.
I however recommend to use my modified pattern for the top, as I think I explain things more clearly. Plus the use of stitch markers makes it a lot easier to know where you need to turn, and you can put down the knitting without getting lost.
I already knitted one more of these, and want to make 10!
 |
| Tall enough to cover my ears |
Modified Pattern for Emma Andersson’s
“The Warm and Cosy Turban”.
Note: The instructions accentuated in blue are either added or modified by me.
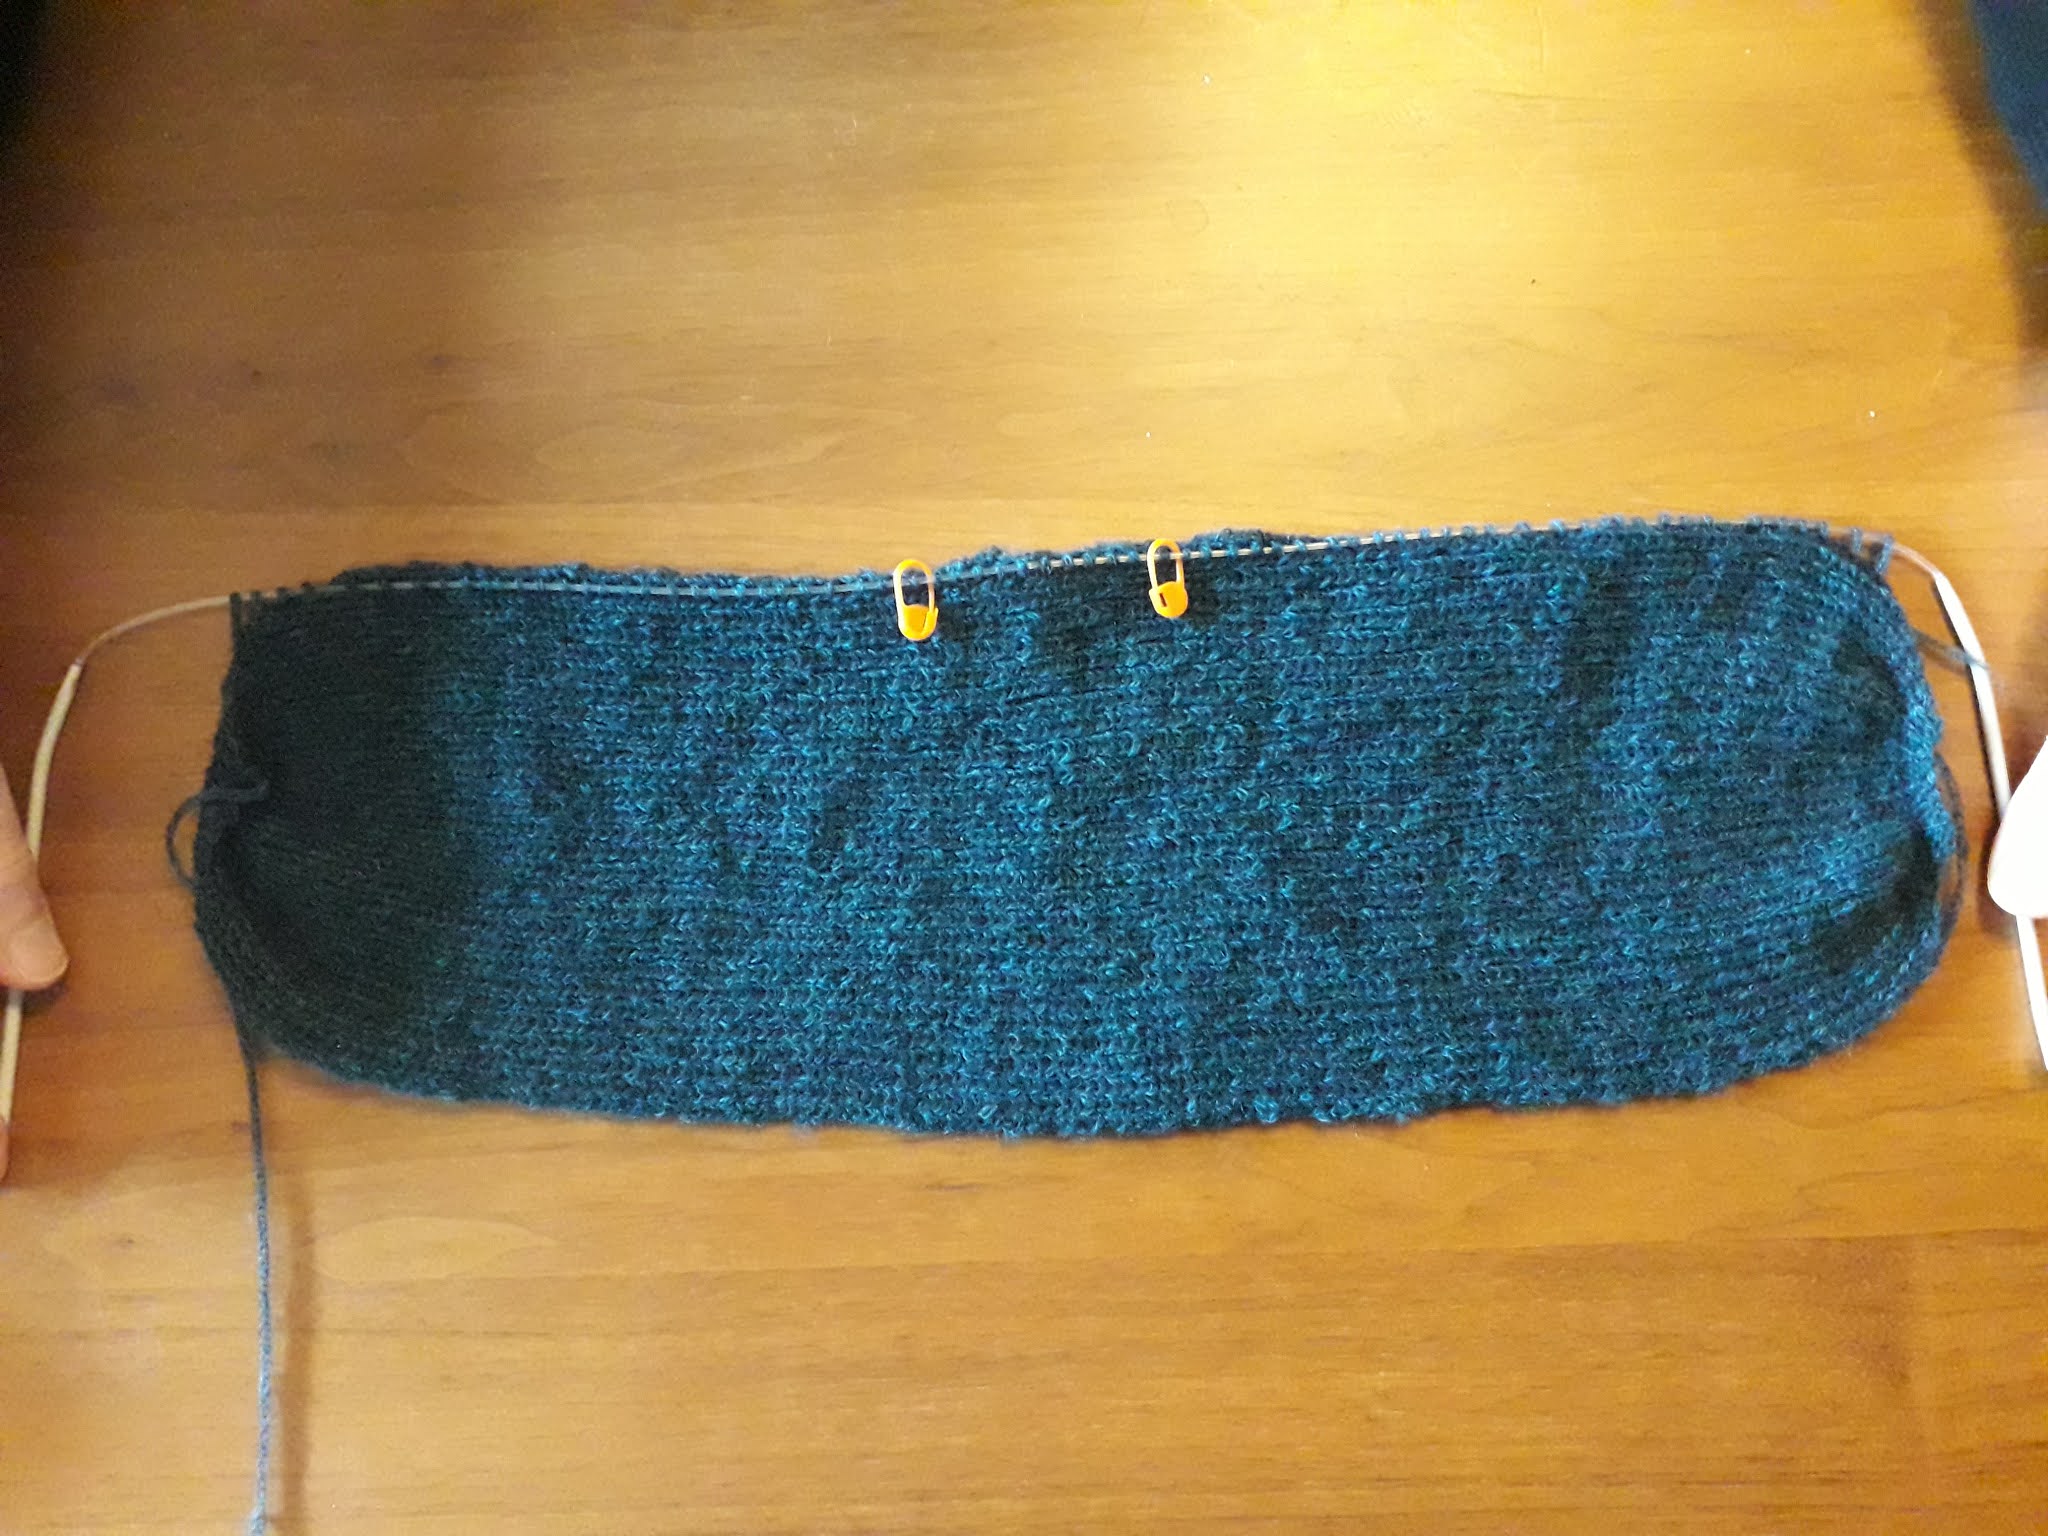
1. Rectangle for crown sides
Part 1 and 2
modifications: I wanted the turban to reach further down on my
head, covering my ears completely.
Part A – Setup
Row 1 (RS): Knit
Row
2: Purl
Row 3: Knit
Row
4: Purl
Row 5: [k1fb] intil 1 st. remains, k1 (19 st)
Row 6: Purl
Row
7: [k1fb] intil 1 st. remains, k1 (37 st)
Row 8:
Purl
Row 9:
[k1, k1fb] until 1 st. remain, k1 (55 st.)
Part B – Rectangle
Row 10 (WS): [p1,
k1] until 1 st. remains, p1
Row 11: [k1, p1]
until 1 st. remains, k1
Repeat rows 10 and
11 until work measures 48 cm.
Part C – Finishing rectangle
Row 1 (RS): [k1, k2tog] until 1 st.
remains, k1. (37 st.)
Row 2: Purl
Row 3: [k2tog] until 1 st. remains, k1 (19 st.)
Row 4: Purl.
Row 5: [k2tog] until 1 st. remains, k1 (19 st.)
Row 6: Purl
Row 7: Knit
Row 8: Purl
Row 9: Knit
Row 10: Bind off all st.
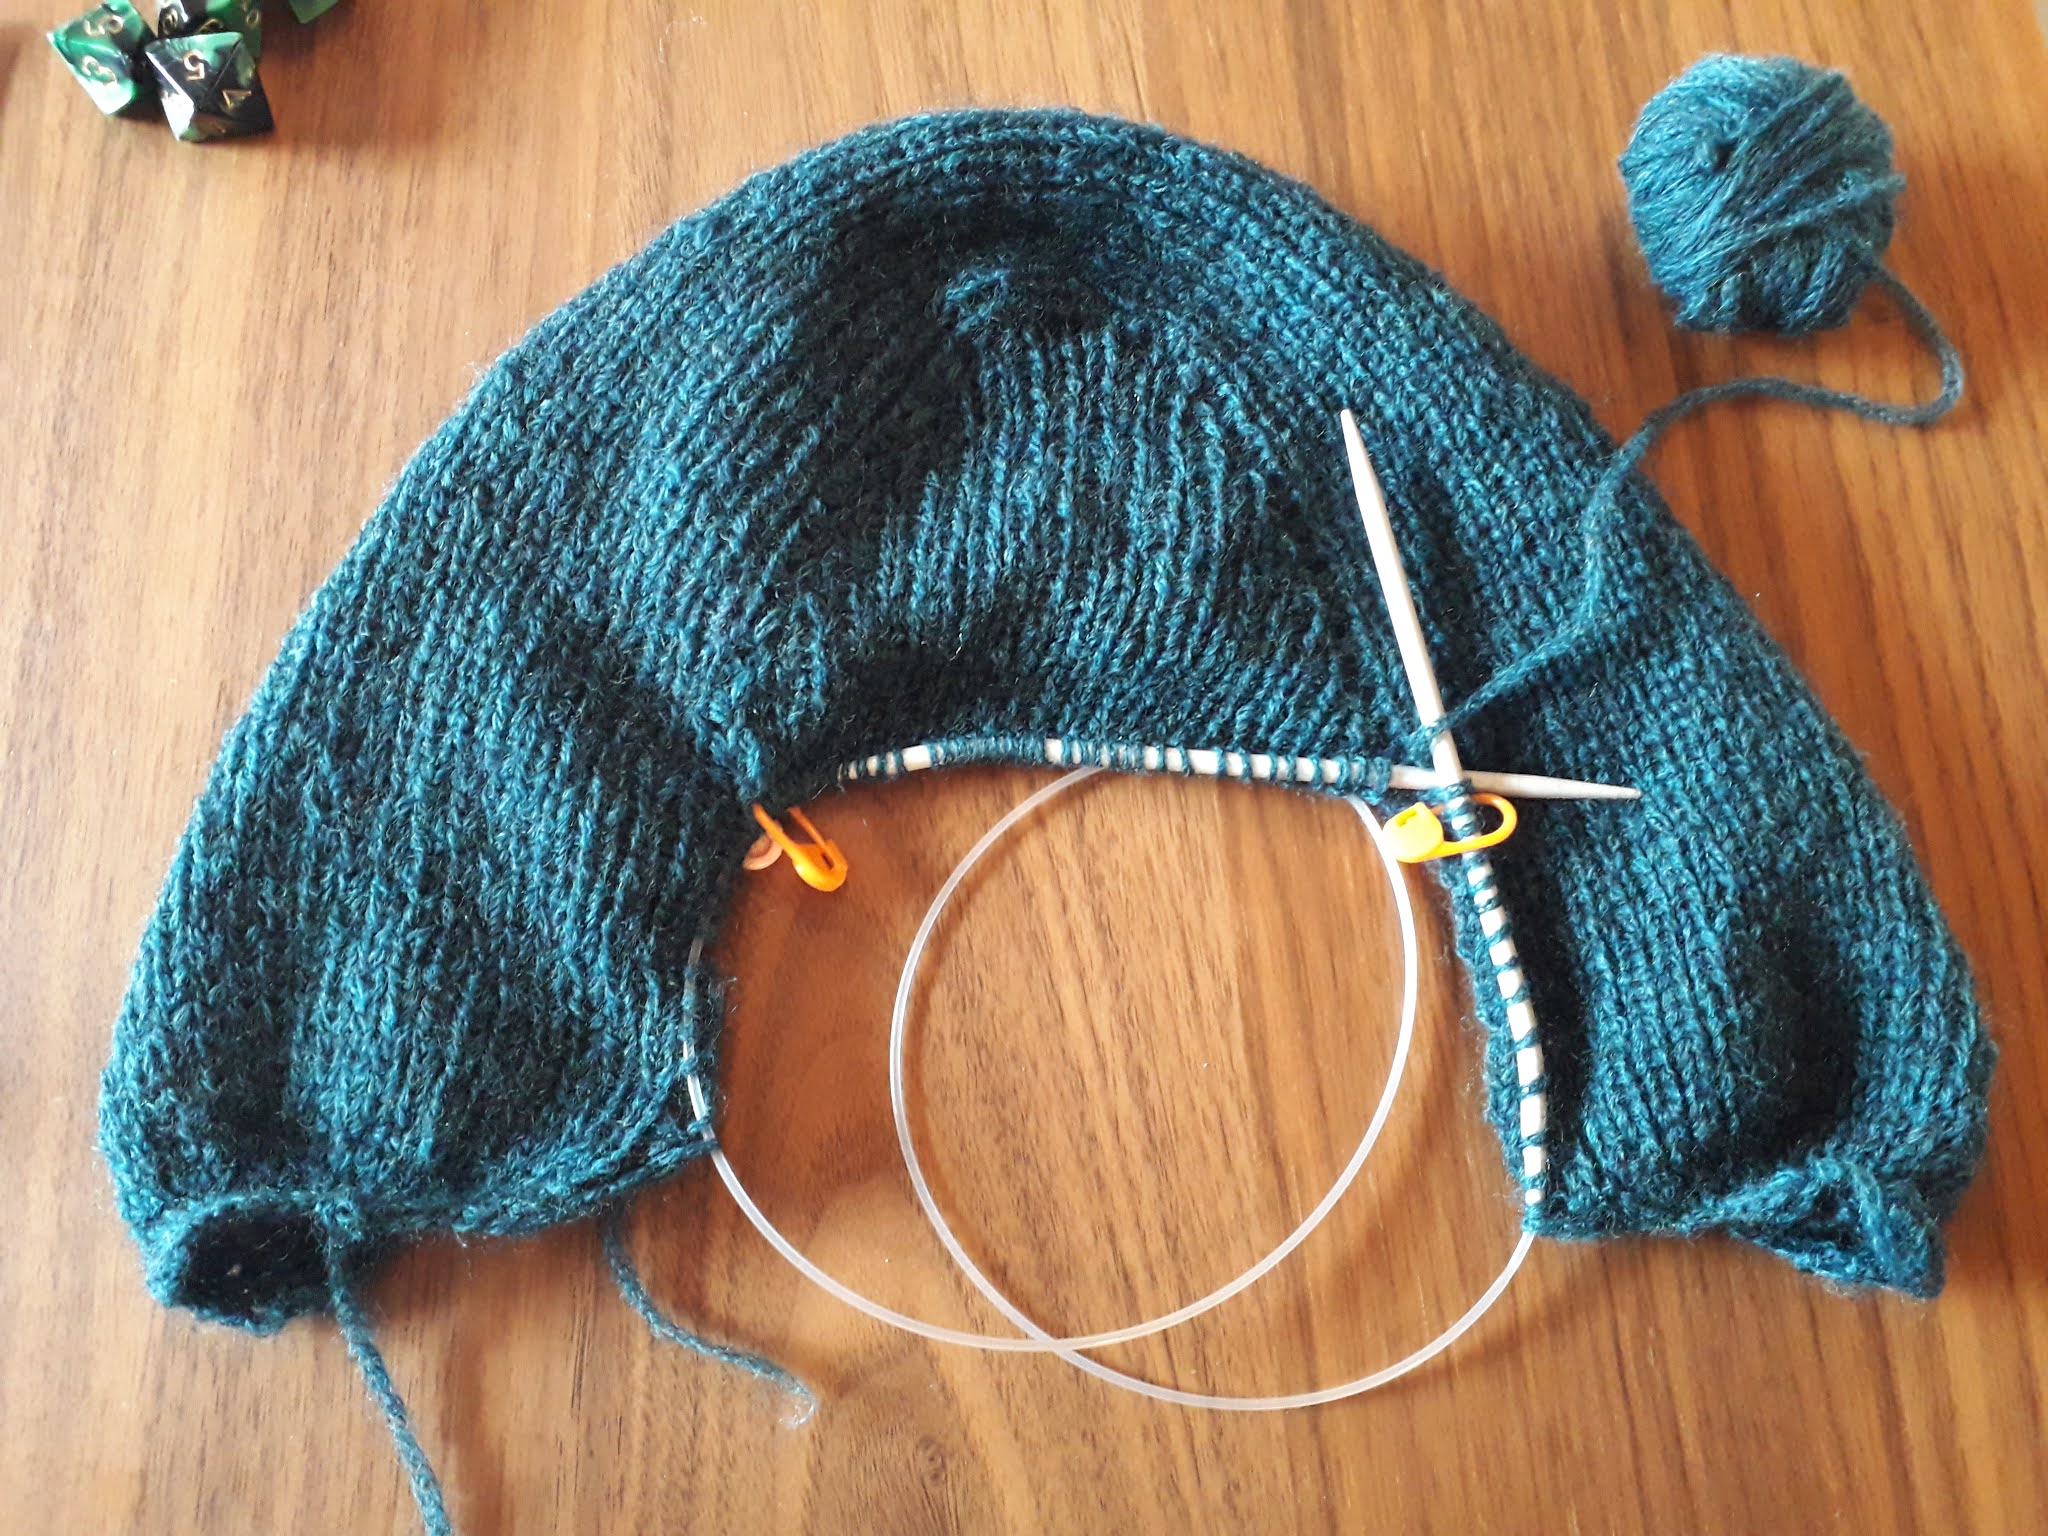
2. The Top
Modifications: I didn’t alter anything about the pattern itself. But I changed and added to the wording to make the steps clearer.
Plus I added how you can use stitch markers to make the pattern easier to follow.
Part A – Increasing
With right side facing you, pick up 67 st. along the side, from the
beginning to the end of the ribbing. Cut yarn.
Count 28 st. from the beginning of
the row, place marker, count 11 st. more, place marker.
Now add yarn at first marker (RS).
Row 1: [k1, p1] five times, k1,
remove marker, w&t.
Row 2: Add marker again [p1, k1]
six times, remove marker, w&t.
Continue in this manner, knitting 1
stitch more for every row.
So on each row you remove the marker every time before you turn, and add it again when you have turned.
Do this 16 times until
you have 41 st. on the needle, when it is time to turn.
Part B – Decreasing
Begin decreasing short rows:
Row
1: Add marker again (except first time), work 40 st in [k1, p1].
Then k2tog with
one st before marker and one st. after marker (remove marker as you
do this), w&t.
Row
2: Add
marker again, work 40
st [k1, p1].
Then p2tog with
one st before marker and one st. after marker (remove marker as you
do this), w&t.
So on each row you remove the marker every time before you knit together turn, and add it again when you have turned.
Continue until all the
original 67 picked up stitches are knitted.
Part C – Finishing top
Next row (RS): [k2tog] until 1
st remains, k1 (21 st)
Row2: Purl
Row3: [k2tog] until 1 st
remains, k1 (11 st)
Row 4: Purl
Row 5: [k2tog] until 1 st
remains, k1 (6 st)
Row 6: Purl
Row 7: Knit
Row 8: Purl
Row 9: Bind off all st.
Part 3 – Finishing hat
Place
the ends (Part A and C) of the original rectangle together, and knot the two tails together.
And then sew the ends
together with each other.
Pull
the top end
down to cover the seam you just made, and sew it to the edge.
Place a nice button or a
beautiful brooch at the front.


- Saga
- Havregrynskugler! 9 December 2022
- Kjole bare en anelse større - Dress just a tad larger 23 November 2020
- Modified Warm And Cosy Turban 2 October 2020
- Slåomkjole - plus slåom og minus ærmer og krave - Improved wrap dress 27 August 2020
- Top fra bindebånd til slåom - Top with short ties to wrap top 20 May 2020